Note this document is based on a development build, and contains some features that are not yet in the production build - these are noted, additionally things may align slightly differently in prior versions than in the versions shown.
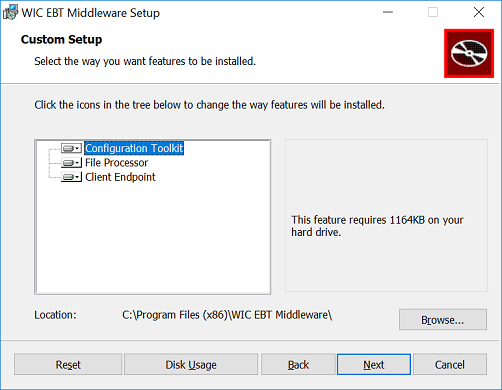
Part of the WEM installation package is an optional component called the configuration toolkit. It was originally intended to be a tool used by the development team, but its usefulness became apparent as configuration grew. While the tool is being improved, it is very much still a beta, and does have some known issues.
Enabling this selection enables the desktop configuration utility. If this feature does not currently exist in the [Install_Path]\Configuration folder, it can be added by modifying the WEM installation through the Programs and Features control panel.
The configuration toolkit doesn't create a desktop shortcut, one can be added manually from the right-click context menu of the application by choosing "Send To" then "Desktop (create shortcut)".
With this feature enabled the configuration toolkit can be used to help configure the WEM for use in the local environment.
For readers who are already familiar with the interface, skip to the Usage section below.
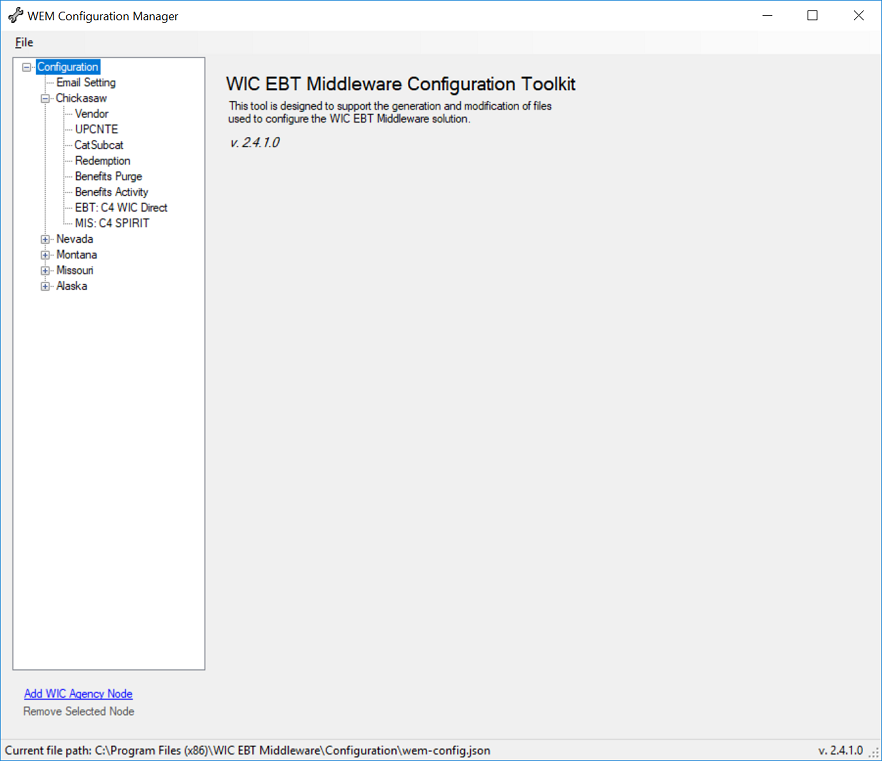
Upon initial load, the user interface appears as shown below.
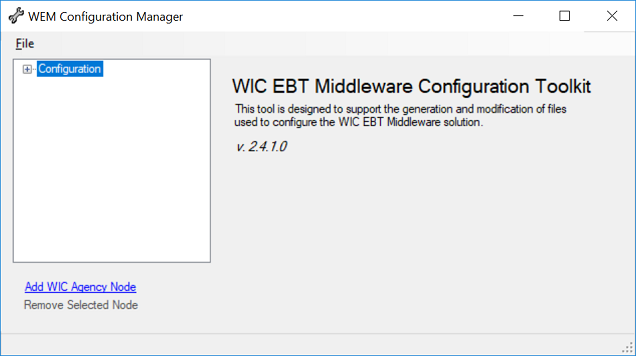
Image compressed horizontally and vertically to save space.
It consists of a menu bar at the top, a tree list to the left, a content pane to the right, and a status bar at the bottom. If this is the first time the tool has been used, there will be no configuration file loaded, and the status bar will read "Idle". If the tool has been used before it will attempt to open the file that was last used, if this is successful the file location will be shown in the status bar instead.
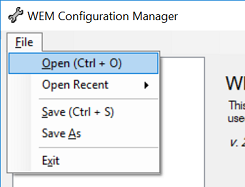
This menu consists of the following commands:
| Command | Shortcut Key | Functionality |
|---|---|---|
| Open | Ctrl + O | Presents the file browser dialog so a file can be selected from the file system. |
| Open Recent | N/A | If files have previously been opened in the configuration toolkit, the five most recent will show as a submenu to this option |
| Save | Ctrl + S | Saves the current working copy of the file. If the file is being saved for the first time, a save file dialog will be presented |
| Save As | N/A | Presents the save file dialog to save the current working copy of the file under a different name |
| Exit | N/A | Exits the application |
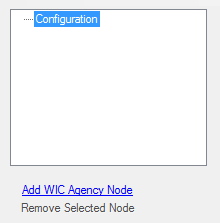
Image compressed vertically to save space.
The tree view consists of two primary components, first is the tree list itself, the other is the commands that appear directly below the tree view. The tree list allows the selection of any node contained within. The commands allow for the removal of a selected node, or the addition of a new high-level "Agency" node. Low level nodes will be added from the selected "Agency" node.
The tree is as follows:
  + Configuration (Root Node)
     - Email Settings
     + Agency
        - File Definitions
        - EBT Endpoints
        - MIS Endpoints
It is important to understand that the WEM was built to process multiple instances in a single installation, so each agency represents an instance. However, e-mail settings are global to the installation. Each agency may have one or more of any type of branch defined: File Definitions, MIS Endpoints, and/or EBT Endpoints.
Important, at this time you must add E-mail Settings manually unless starting from an existing wem-config.json template. A base template is installed by default alongside the tool in the configuration folder
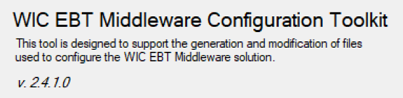
The content pane will show context based content. It is determined by the type of node selected in the tree view. The root node will display information about the configuration toolkit, including the current version of the software.
When the e-mail settings node is selected it will show the e-mail settings for the system. When an agency node is selected it will display information about the agency. MIS nodes will display a tab view for providing MIS related data. Likewise EBT nodes will display a tab view for providing EBT related data. File Definition nodes will display information about the type of file defined within.

Image compressed horizontally to save space.
The status bar consists of two components. First is the status indicator. This will either show "Idle" in the event a file is not loaded, or the path to the loaded file. Last is the current version of the software.
The file path display is a feature added in 2.1.0.0.
If a file is not yet opened, this can be accomplished by clicking "File" on the menu bar at the top. See the command descriptions above for a better understanding of the file menu's options.
Once a file is opened, the status bar should update to show the path of the newly opened file, and the tree nodes should update to show any defined nodes. The following is an example based on a test system wem-config.json opened in the configuration toolkit.
Selecting "Email Settings" will display the E-mail Settings Configuration Pane. This allows the user to specify information about how the system should route any e-mail messages it sends.
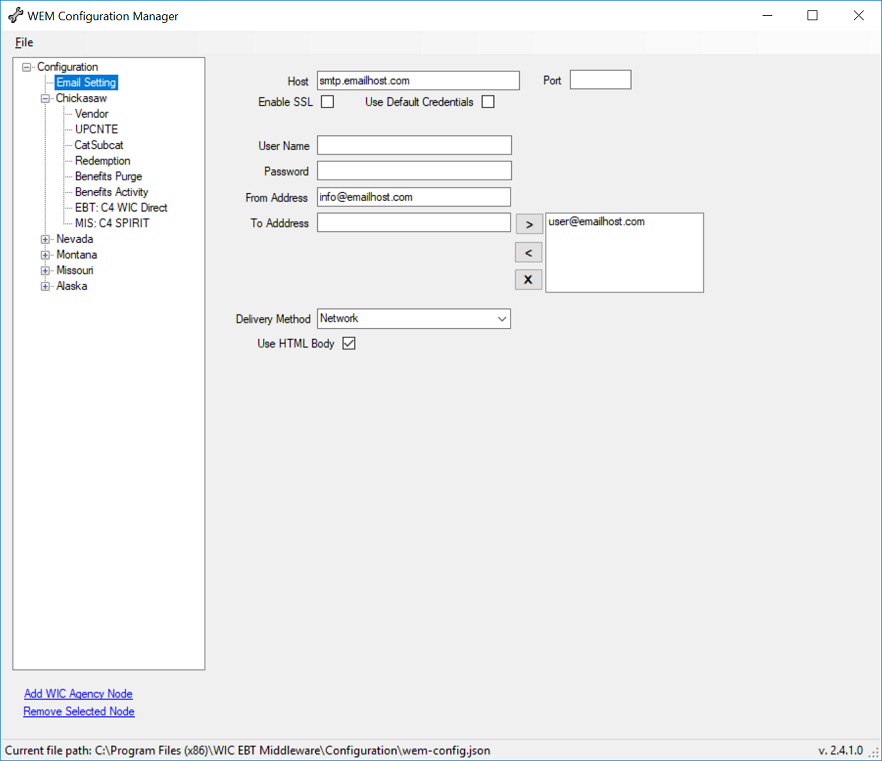
These values are all defined in detail the Configuration Section > E-mail Settings of this document.
Selecting an existing Agency from the root node will load that agency into the editor within the content pane. Alternatively, selecting "Add WIC Agency Node" from the tree view commands area will create a new empty node to start providing information to define a new agency.
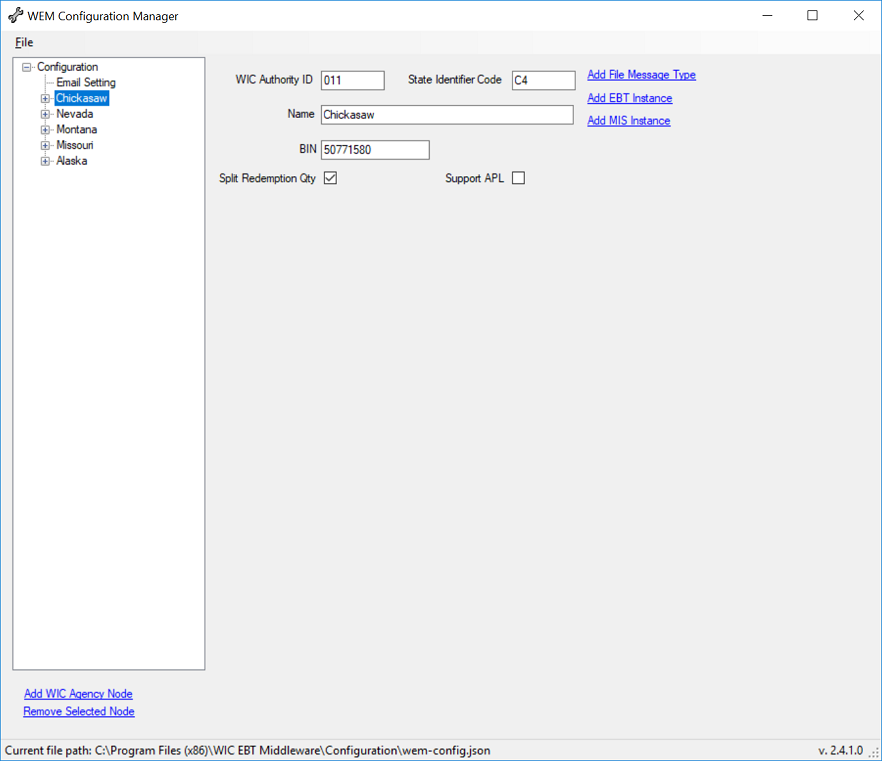
These values are all defined in detail the Configuration Section > Agency of this document.
Choosing an existing file definition from the agency node will open the chosen definition in the content pane. A new definition can be created by first selecting an agency, and then selecting "Add File Message Type" from the content pane. This command can be used to add any number of file definitions to the system. To remove a file definition, simply select the node of the definition to remove and choose "Remove Selected Node" from the tree view commands.
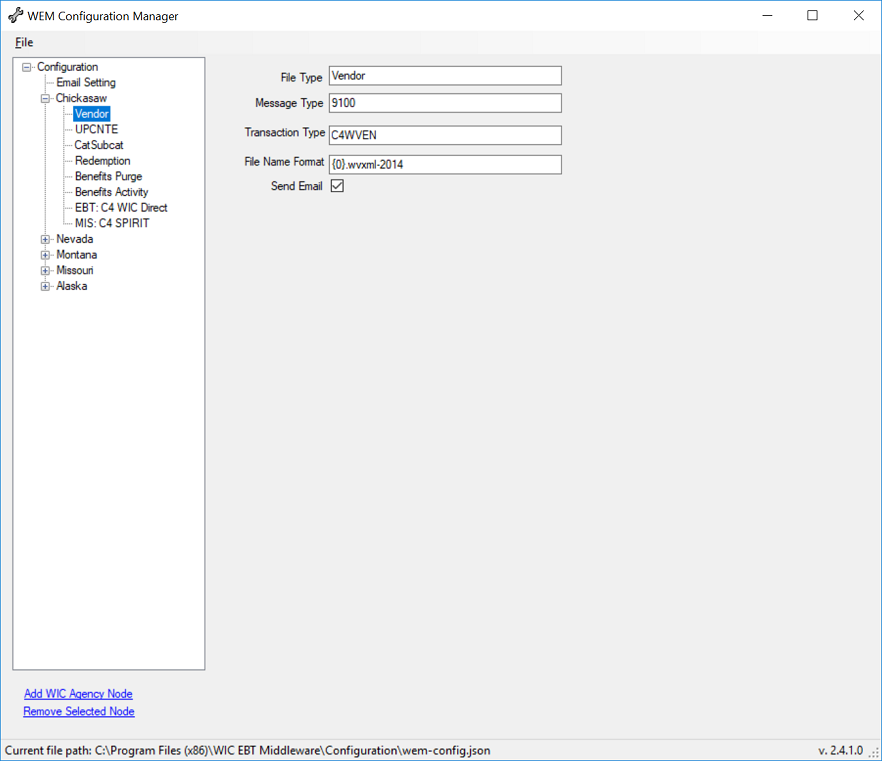
These values are all defined in detail the Configuration Section > Agency of this document, in particular they are listed under the "File Element Types" setting.
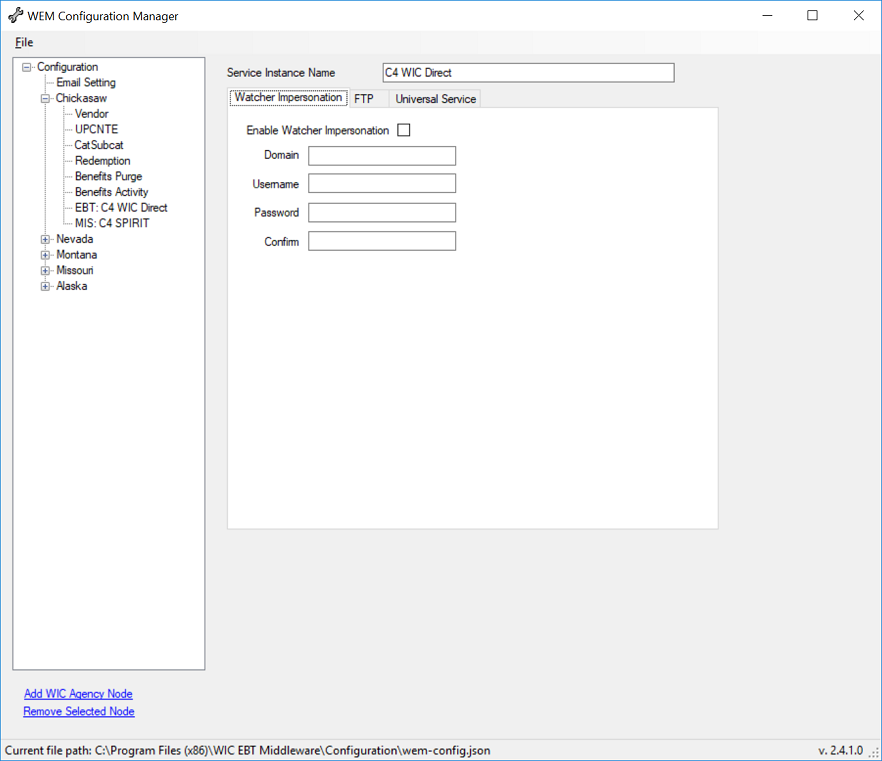
Like file definitions, choosing an existing EBT endpoint definition from the agency node will display the definition in the content editor. Also, similarly, choosing "Add EBT Instance" from the agency content pane will create a new EBT endpoint definition to start from scratch. However, different from the previously mentioned elements, the EBT definition contains a substantial amount of content and thus necessitates a tab layout for the content pane.
Organized in alphabetical order, all of the values for the entire EBT node (all of the tabs) are defined in detail in the Configuration Section > EBTHosts section of this document.
Service instance name is shown outside of the tabs, this is used as the name displayed in the node as well as the name to which the various parts of the WEM know this instance.
Watcher impersonation is to support the file watcher process. More specifically, when files are dropped into the WEM Inbox or WEM Proxy Inbox they are picked up automatically by a file watcher. This watcher can be configured using a local file system path, or a universal naming convention (UNC) path. Different security setups may require this user to be different from the account under which the services run. Using this tab the watcher for this EBT instance can be configured to run as a different user. The credentials for this user are supplied in the tab. If credentials are supplied and watcher impersonation is enabled, the watcher will run as the specified user, regardless of the user executing the service. In this context, we are referring to the watcher that watches the FTPInboxProxy.
The FTP tab is intended to collect information about the FTP environment of the system. WEM can be configured to run with Secured SFTP (SFTP) or standard non-secure FTP (FTP). It collects base information about the FTP environment as well as user information, and proxy delivery paths. These paths are important as they are part of how the WEM recognizes if a file came in from the EBT endpoint or the MIS endpoint.
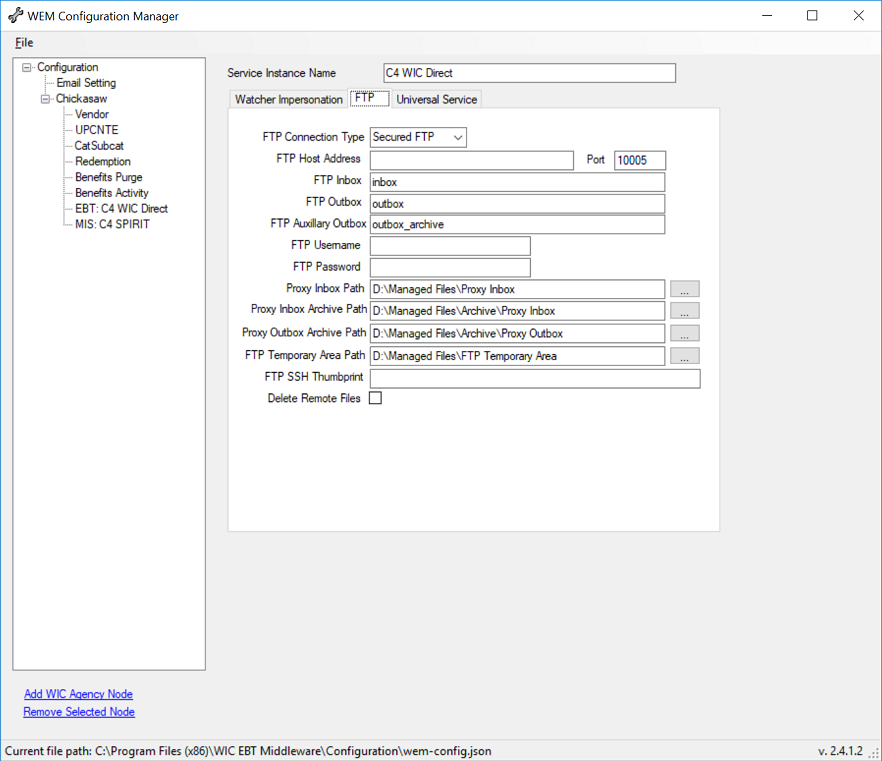
The SSH Thumbprint editor is a feature added in 2.1.0.0.
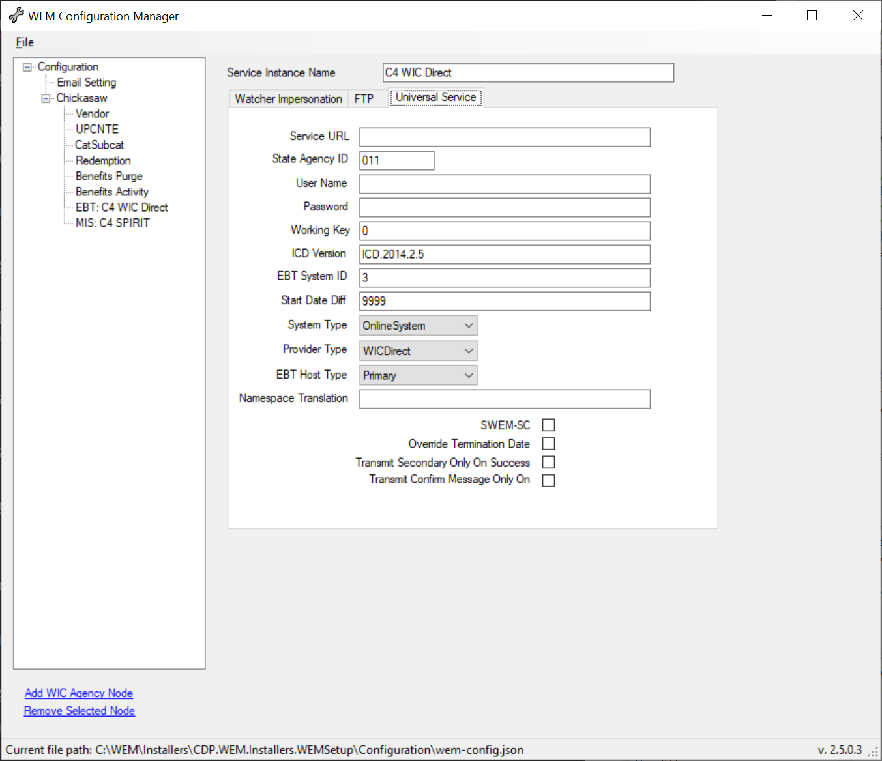
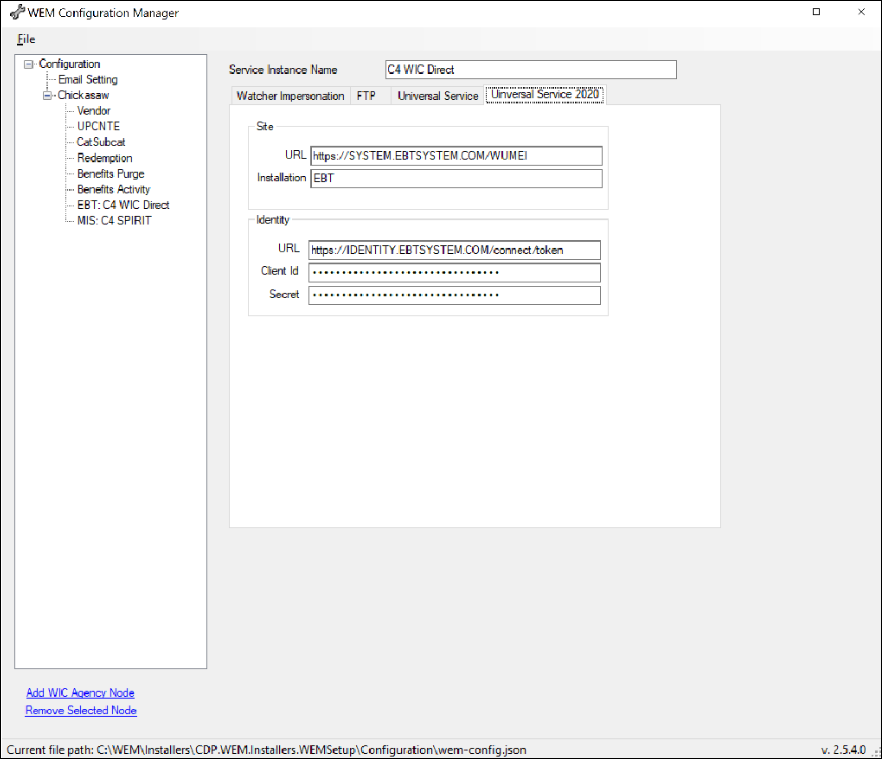
The Universal Service tab collects information about the EBT service provider, and the connection information needed for that provider. This is also the area where the type of system is defined. If there is an offline system present, then the WEM expects that the presence of a second online system indicates that system is SWEM-Q.
The Universal Service 2020 tab collects information about the UI2020 EBT service provider, and the connection information needed for that provider.
Most similar to EBT Endpoints, the MIS endpoint definitions follow the same mechanic for editing and adding, and is the only other component that needs tab controls to organize the components. To add a new MIS Endpoint node, select "Add MIS Instance" from the agency content pane, or simply select an existing instance to edit it. Delete an instance by selecting the tree node and choose "Remove Selected Node" from the tree view commands section.
Organized in alphabetical order, all of the values for the entire MIS node (all of the tabs) are defined in detail in the Configuration Section > MISClients section of this document.
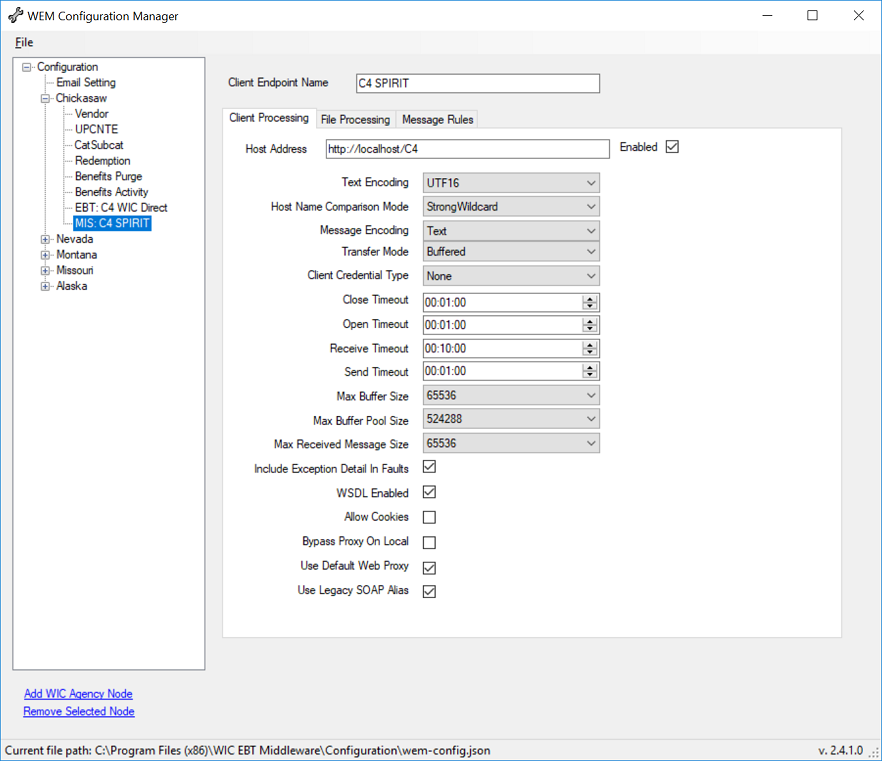
Client Endpoint name is shown outside of the tabs, this is used as the name displayed in the node as well as the name to which the various parts of the WEM know this instance.
Client processing is where the SOAP services are configured. This tab allows for the definition of the host address and a variety of information about the messages being transmitted to and from the host. It also allows for the enabling of the SOAP web service. In any MIS where a SOAP endpoint is needed this service will provide that functionality.
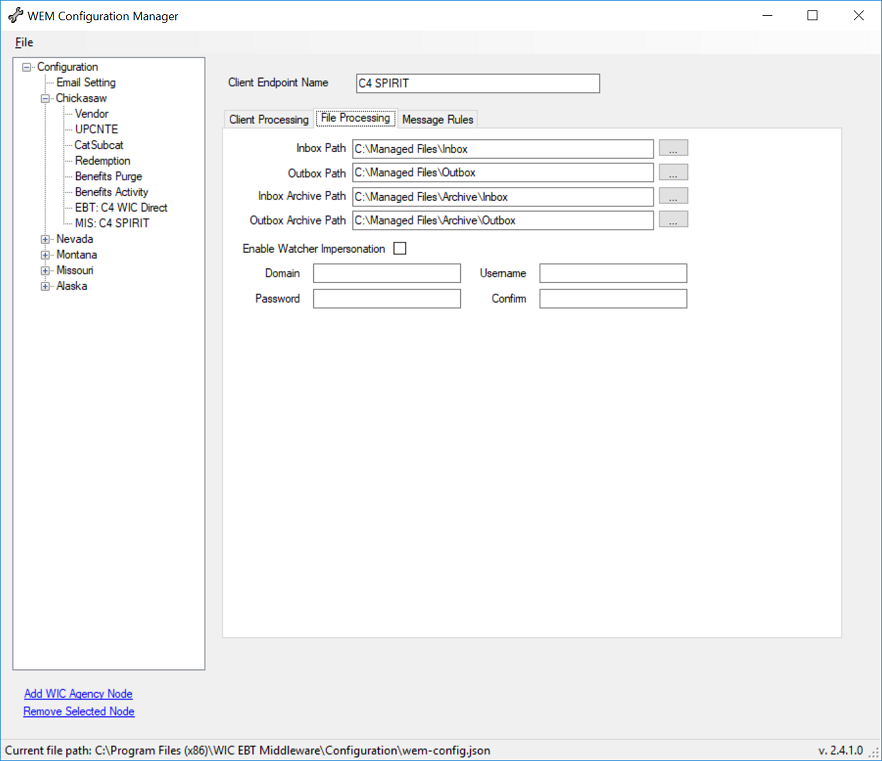
On this tab the file processor is configured, in particular the MIS related paths, watcher impersonation for the Inbox Path, and memory-mapped file usage for the paths defined on this tab.
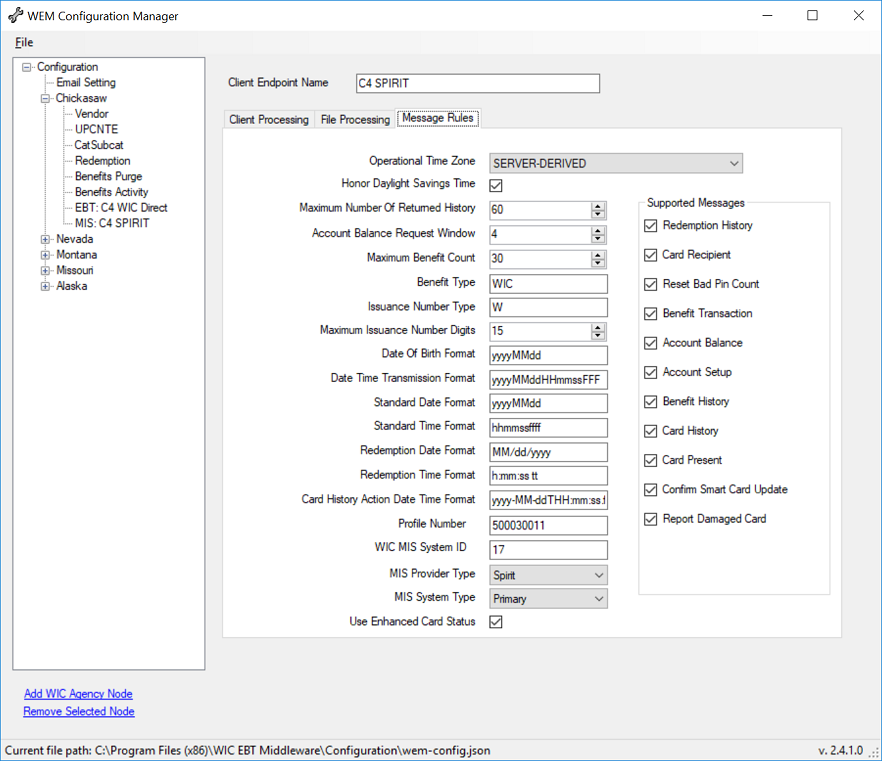
The rules defined in this tab alter the behavior of messages dramatically, and should only be altered with an understanding of the consequence. As with all the tabs there are full definitions of each field in the Configuration Section > MISClients section of this document.
There are several known issues in this tool, below is a current list as of 2.1.0.0 (Development Build)